Installing Traditional Wooden Drawer Runners in a Tool Chest
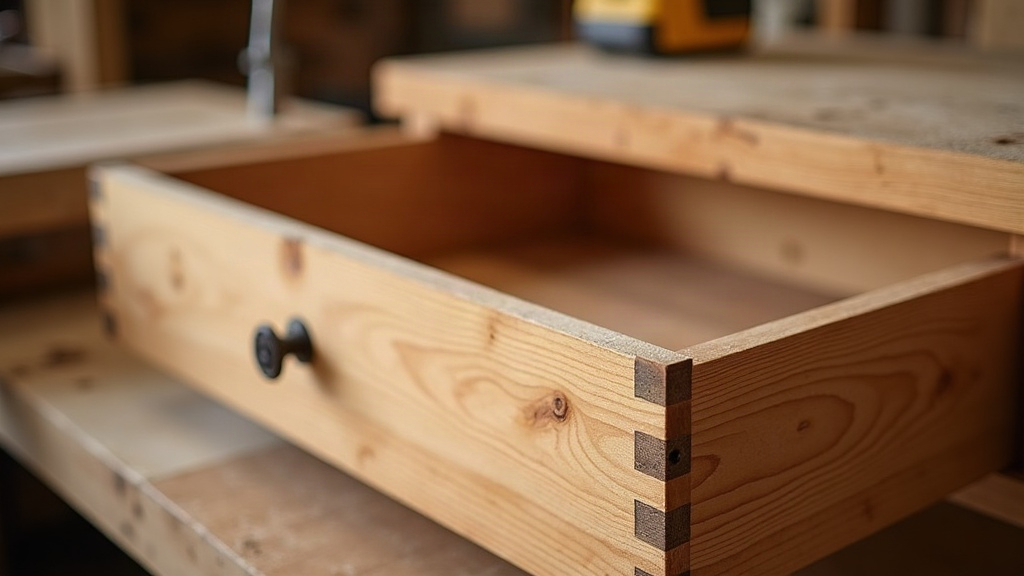
Installing traditional wooden drawer runners in a pine tool chest is still the best way to get smooth, quiet, long-lasting drawer action without reaching for a box of metal slides. The method relies on solid wood runners, kickers, and guides fitted right into the carcass itself, a technique cabinetmakers have leaned on for centuries. Why? Because it’s strong, it’s fixable when something wears out, and it actually moves with pine the way the wood wants to move.
Why Choose Wooden Runners Over Metal Slides
Sure, ball-bearing metal slides go in fast. Five minutes with a drill and you’re done. But they look wrong on a period-style pine chest, and honestly, they don’t hold up the same way under real shop use. Wooden runners win on a few fronts:
- Durability – you can re-plane a worn runner or swap it out thirty years from now. Try finding replacement parts for a slide model that got discontinued in 2009.
- Weight capacity – a tool chest loaded with chisels, planes, and saws puts real stress on drawer hardware. A properly fitted wood runner shrugs that off; a cheap extruded slide can flex or bind.
- Authenticity – if you’re building something that’s supposed to look like it came out of an 1890s joiner’s shop, metal slides break the spell instantly.
- Silence and smoothness – wax a wood-on-wood joint properly and it glides without a rattle or a squeak. No ball bearings clicking around either.
Understanding the Three-Part System
Each side of the drawer opening gets three parts working together:
- Runner – the horizontal strip fixed to the case side that the drawer actually rides on.
- Kicker – sits directly above the drawer side and stops the drawer from tipping nose-down when you pull it open with a full load of tools inside.
- Guide (optional, mostly for narrow drawers) – a vertical strip that keeps the drawer from wandering left or right.
Here’s a detail a lot of first-time builders miss: even if your whole carcass is pine, the runners themselves should be a harder wood. Beech, maple, oak, something that won’t chew out after a few hundred open-close cycles. Pine is soft enough that bare pine-on-pine contact wears a groove into the case side within a year or two of regular use. The hardwood runner takes the abuse instead.
Step-by-Step Installation
1. Mill the Runner Stock
Aim for roughly 3/4” wide by 3/8” thick, cut a touch shorter than the chest’s interior depth. Using a denser hardwood here isn’t fussiness for its own sake, it genuinely multiplies the runner’s service life against all that back-and-forth travel.
2. Mark the Drawer Opening Height
Don’t trust the cutting list for this one. Measure straight off the actual drawer sides. Pine carcasses shift a little from board to board, and sizing runners to the real drawer (not the plan) is what gets you a fit that doesn’t bind.
3. Attach Runners to the Case Sides
- Glue only the front third of the runner. For the rest, pin or screw through elongated holes running toward the back.
- This “glue front, pin back” approach lets the pine case expand and contract across the seasons without splitting the runner or cracking the case side. Skip this and you’re asking for trouble come August.
4. Install Kickers Above the Drawer
Set a kicker strip directly above each runner so it just touches the top of the drawer side, no pressure, no gap. This is what keeps a drawer loaded with chisels and hand planes from sagging at the front when it’s pulled all the way out. It’s one of the more common failure points in chests that carry real weight.
5. Fit Drawer Guides if Needed
If the drawer’s narrower than the full case width, add a center guide strip. Cut a matching groove in the drawer bottom, or attach small blocks to the drawer sides that ride along the guide instead.
6. Test and Adjust
Slide the drawer in dry, no wax yet, and check three things:
- Does it bind at the front or back?
- Is it racking (one side sliding ahead of the other)?
- Is there too much side-to-side wobble?
Make adjustments by planing the runner, not the drawer. A runner takes two minutes to re-fit. A finished drawer, once you’ve planed it wrong, is a much bigger headache.
Finishing Touches
Once everything slides smoothly, wax the contact surfaces, paraffin or a dry graphite lubricant both work well. Stay away from oil. In a tool chest full of sawdust and metal filings, oil just turns into grit-paste over time, which is the opposite of what you want.
Common Mistakes to Avoid
- Skipping pilot holes – pine splits if you so much as look at it wrong with a screw. Always pre-drill.
- Gluing the full runner length – this fights the wood’s natural movement and can split the case side within a single season of humidity swings.
- Ignoring seasonal timing – fit your drawers during moderate humidity, not in bone-dry January or a muggy August. Fit it too tight in winter and it’ll jam solid come summer.
Conclusion
Wooden drawer runners still earn their reputation as the gold standard for pine tool chests, strong, repairable, and smooth without a single piece of hardware store metal involved. Pair a hardwood runner system with careful, patient fitting and the right wax, and your drawers will keep gliding for generations. That’s a lot more than you can say for most off-the-shelf metal slides once they’ve seen a decade of real shop use.