Building a First Hand-Cut Through-Dovetail Jewelry Box From Walnut
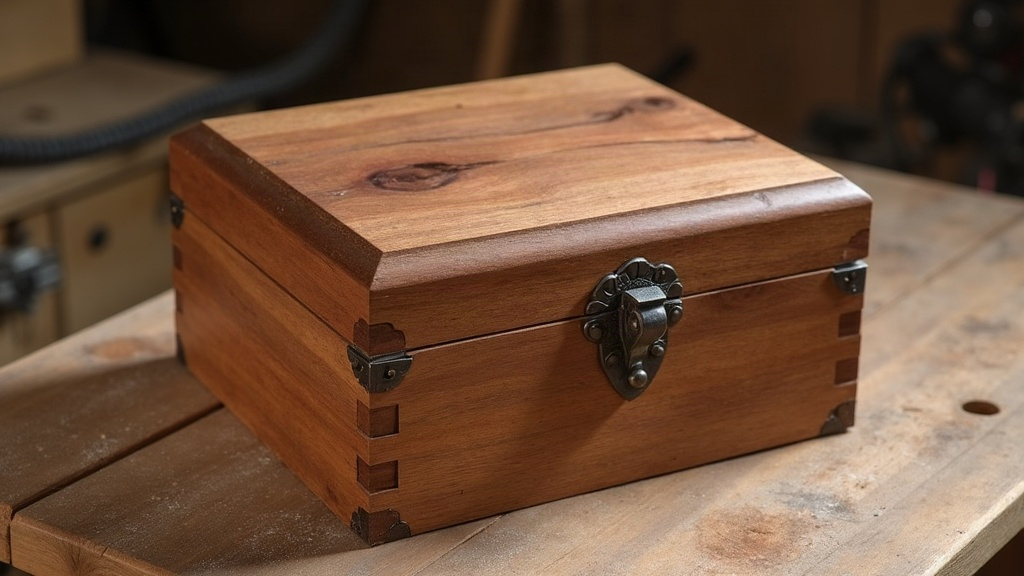
Building your first hand-cut through-dovetail jewelry box out of walnut is one of those projects that teaches you more in a weekend than months of reading ever could. It’s also genuinely rewarding: you end up with something worth keeping, maybe even passing down. This guide covers material selection, the actual layout and cutting sequence for through-dovetails, and the assembly steps that turn four joined panels into a finished heirloom.
Why Walnut and Why Through-Dovetails
Walnut earns its reputation with small boxes for good reason. It’s dense enough to hold crisp dovetail corners, it machines and hand-planes cleanly, and it ages into a rich chocolate-brown that barely needs finish to look good. Compare that to something like pine or poplar, where the pins and tails chip out the moment your saw wanders off-line. Walnut forgives a little more, which matters when your saw control is still a work in progress.
Through-dovetails, the kind where the joint shows on both faces, are the classic pick for jewelry boxes for a few reasons:
- They’re mechanically strong on their own, without glue doing all the heavy lifting
- The exposed joinery becomes the design, not something you’re trying to hide
- They force you to build real hand-tool skills: sawing to a line, chiseling to a baseline, paring a fit tight enough that it doesn’t wobble
Tools You Actually Need
You don’t need a fully stocked hand-tool shop to get started. Here’s what actually matters:
- A fine-tooth dovetail saw (rip-filed, 14-20 TPI)
- A marking gauge for baselines
- A sliding bevel or dedicated dovetail marking gauge (1:6 or 1:8 ratio works for hardwood)
- Sharp bevel-edge chisels (1/4”, 1/2”, 3/4”)
- A coping saw for waste removal
- A square, a sharp pencil or marking knife, and a mallet
Secondhand saws and chisels work just fine if you sharpen them properly. A $15 flea-market chisel that’s been honed to a mirror edge will outcut a $60 dull one every time. Sharpness beats brand name, full stop.
Milling Your Walnut Stock
Start with walnut boards planed to final thickness, typically 3/8” to 1/2” for a jewelry box. Mill all four sides, the bottom panel, and the lid blank together so the grain and color actually match. Nothing’s more disappointing than a box where one side is pale and another is nearly black. Cut your sides to final length with a couple extra millimeters of slack for trimming after assembly. That small margin has saved more than a few “almost perfect” boxes from the scrap pile.
Laying Out the Dovetails
- Set your marking gauge to the exact thickness of your stock and scribe baselines on all four pieces: front, back, and every inside and outside face.
- Decide tails-first or pins-first. Tails-first is more forgiving for beginners since you fit the pins to the tails afterward, rather than the other way around.
- Mark tail spacing with a dovetail marker or bevel gauge. For a small box, three or four tails per corner usually looks balanced, not cramped, not sparse.
- Transfer the lines square across the end grain.
Cutting the Joint
- Saw just to the waste side of your lines, keeping the saw plumb and tracking both faces as you go.
- Remove the bulk of the waste with a coping saw, leaving about 1/16” standing proud of the baseline.
- Pare down to the baseline with a chisel, working from both faces toward the middle. Walnut splinters easily at thin edges if you pare from a single direction, so don’t rush this part.
- Transfer the tail shape onto the pin board with a marking knife. A pencil line just isn’t precise enough here.
- Cut and pare the pins the same way, test-fitting often with light mallet taps. If it doesn’t slide together with gentle persuasion, don’t force it. Go back and pare a shaving more.
Assembling the Box
Dry-fit all four corners before glue ever touches the wood. Check squareness by comparing diagonal measurements corner to corner; they should match within a millimeter. Apply glue sparingly on the pin cheeks (never on end grain, it won’t hold anyway), clamp across the joints, and let it cure fully before freeing the lid with a thin kerf saw.
Finishing Touches
- Rout or chisel a shallow rabbet along the inside lid edge for a hinge, or just leave it as a simple friction-fit lid
- Fit a thin plywood or solid bottom into a groove rather than gluing it flat against the underside
- Finish with Danish oil or a wipe-on polyurethane. Walnut barely needs the help, but a light coat brings out the depth in the grain
Common Beginner Mistakes to Avoid
- Sawing past the baseline on the show face (this ruins the clean look instantly, and there’s no fixing it)
- Paring too aggressively from one direction, which causes blowout on the far side
- Skipping the dry fit and gluing up a box that’s out of square
- Working with dull chisels, which crush the fibers instead of slicing through them cleanly
Conclusion
A hand-cut through-dovetail jewelry box in walnut is a realistic first joinery project, as long as you slow down, keep your tools sharp, and accept that your first corners won’t look perfect. They rarely do, for anyone, even people who’ve been at this for years. What you’ll notice is that your second box looks tighter than your first, and your third tighter still. That visible progress, corner by corner, is really the whole point of taking this project on.