Building a Beginner-Friendly Shaker Step Stool From Poplar
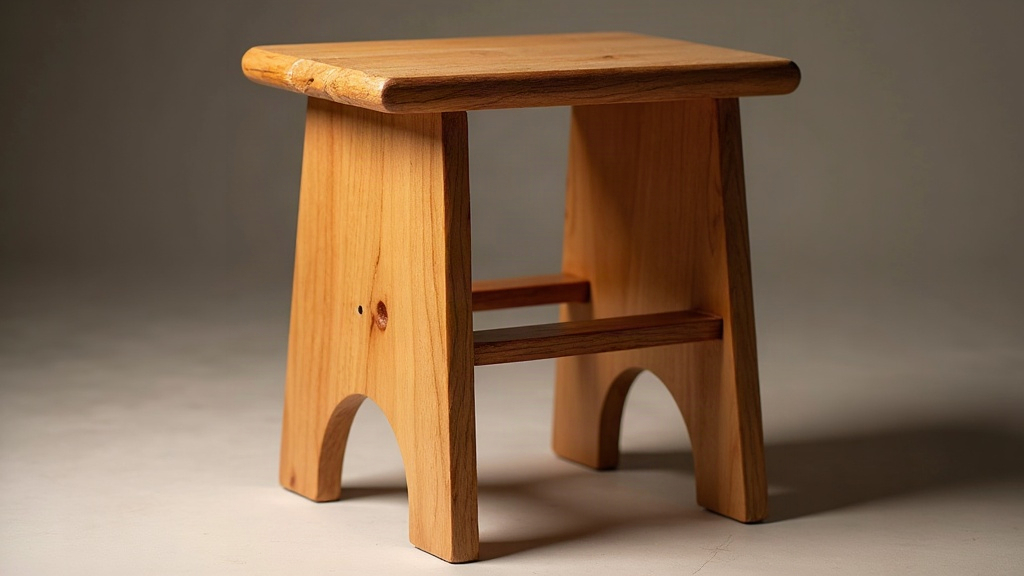
Building a Shaker Step Stool with Hand Tools: A Beginner’s Guide
Building a Shaker step stool from poplar using only hand tools is one of the smartest ways for a beginner to learn real joinery without owning a single machine. It’s a classic two-step design, and it teaches sawing, chiseling, and smoothing all at once, while leaving you with a piece you’ll actually use. Kitchen, closet, garage, wherever you need a boost.
Why Poplar and Why Hand Tools?
Poplar makes sense as a first project wood for a handful of practical reasons:
- Affordable. Nowhere near the price of walnut, cherry, or white oak.
- Soft enough to work easily. Plane it, chisel it, and the wood won’t fight you at every pass.
- Stable once dry. You won’t fight cupping or warping down the road.
- Takes paint beautifully, which fits the Shaker tradition (though a clear finish looks fine too, if you don’t mind that faint green tint).
Working entirely by hand isn’t some nostalgic exercise. It’s genuinely the quickest way to understand how wood actually behaves. You feel grain direction change through the plane sole, you watch tear-out start before it ruins a board, and you learn to correct course before a mistake becomes permanent. No noise, no dust collector humming in the corner, no risk of a kickback sending a board across the room. If you’re working out of an apartment or a shared garage, that matters more than people admit.
Tools You Actually Need
You don’t need a wall of tools to get started. A small, functional kit covers it:
- A backsaw (dovetail or tenon saw) for clean, straight cuts
- A coping saw for the curved step profile
- Bench chisels in 1/4”, 1/2”, and 3/4”
- A block plane and a smoothing plane (a No. 4 does the job well)
- A marking gauge and combination square
- A mallet
- Sandpaper in 120, 180, and 220 grit for final smoothing
If this is your first tool purchase, spend the money on a sharp chisel set and a decent backsaw. A dull tool will frustrate you far more than a missing skill ever will.
Cutting List
For a standard two-step stool, roughly 18 inches tall:
- 2 side panels (legs): 3/4” x 10” x 18”
- 1 top step: 3/4” x 10” x 12”
- 1 lower step: 3/4” x 10” x 12”
- 2 stretchers/aprons: 3/4” x 3” x 10”
Rough-mill your boards a bit oversized, then bring them to final thickness by hand plane. The first board feels slow, almost painfully so. By the third or fourth, your stroke settles in and the whole process speeds up on its own.
Step-by-Step Build Process
1. Lay Out the Side Panels
Trace the classic Shaker profile: a gentle curve at the top for a handhold, angled cutouts below for the two steps. Rough out the curves with a coping saw, then refine the edges with a spokeshave or chisel until the line feels clean under your thumb.
2. Cut the Dados for the Steps
Mark the dado locations with a marking gauge, saw the shoulders with your backsaw, then clear the waste with a chisel, working in from both faces toward the center to avoid blowing out the back. Aim for a snug fit that holds together without glue. If it needs force to go together before glue, it’ll need even more force to come apart later, which isn’t what you want.
3. Dry-Fit Everything
Put the whole stool together without any glue. Set it on a flat surface and check for rocking. Pare down high spots with a chisel, or shim low ones, until it sits rock solid.
4. Glue and Clamp
Glue the joints, clamp up, and leave it overnight to cure. Wipe off squeeze-out right away. Poplar has a habit of blotching under finish if you leave dried glue film on the surface, even in spots you think you’ll sand out later.
5. Final Smoothing
Plane down any rough patches that are left, then work through your sandpaper grits in order. Soften the edges slightly, either with sandpaper or a pass of the block plane, for that comfortable, worn-in Shaker feel.
6. Finish
Milk paint in traditional colors (barn red, mustard, soft blue) is historically accurate and genuinely forgiving if you’re new to finishing. Prefer a natural look? A couple of coats of wipe-on oil or shellac will bring out poplar’s quiet grain pattern.
Common Beginner Mistakes to Avoid
- Skipping the dry fit. Glue doesn’t hide gaps. It just locks them in place forever.
- Ignoring grain direction while planing. That’s how you end up with tear-out you can’t sand away.
- Over-sanding the curves. Too much sanding softens the crisp lines that give Shaker furniture its character.
- Working with dull chisels. A dull edge is both less accurate and, somewhat counterintuitively, more dangerous than a sharp one, since it needs more force and slips more easily.
Final Thoughts
A Shaker step stool in poplar, built with hand tools alone, is about as good a first furniture project as it gets. It’s affordable, doable in a weekend, and teaches layout, sawing, and chiseling all in one go. By the time you’ve sanded that last curve smooth, you won’t just own a stool. You’ll have the groundwork for every hand-tool project you take on after it.