Fixing Racked Cabinet Carcasses After Uneven Frameless Drawers
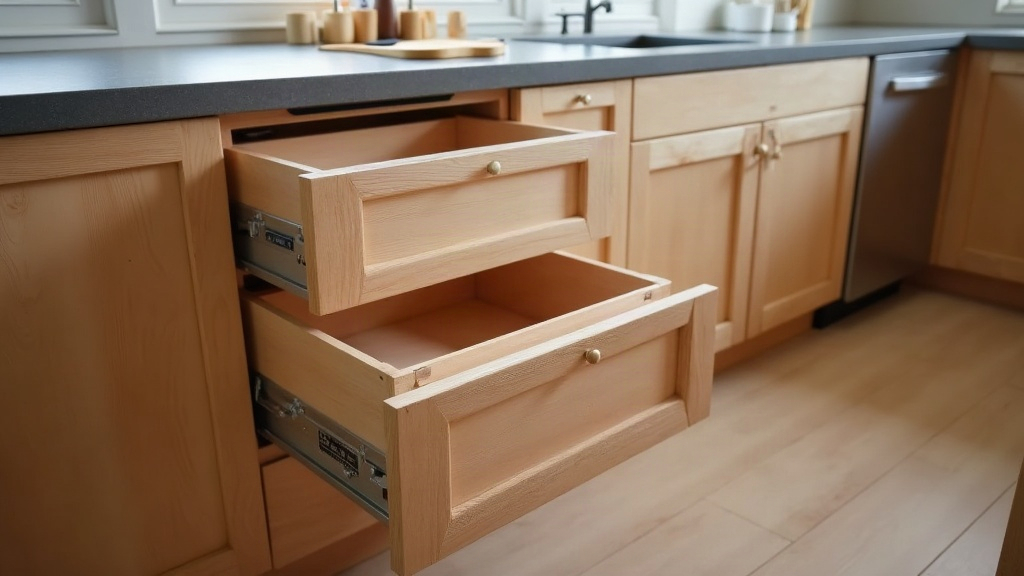
If your frameless kitchen drawers sit crooked, bind halfway, or show uneven reveals after installation, the real problem usually isn’t the drawer box. It’s a racked carcass. Racking happens when a cabinet’s square shape twists into a parallelogram, throwing off every reference surface the drawer slides depend on. The fix involves finding the source of the twist, squaring the box, and locking it in place for good before the drawers go back in.
Why Frameless Carcasses Rack So Easily
Unlike face-frame cabinets, frameless boxes rely entirely on the panels themselves for structural rigidity. There’s no solid wood frame holding everything true, so any weakness compounds fast:
- Thin back panels (1/4” or less) that aren’t fully captured in a dado flex under load.
- Missing or loose hanging rails at the top back of the box.
- Uneven floor or wall contact during installation, which forces the box to twist just to meet the wall.
- Fasteners driven before checking square, which locks the distortion in permanently.
- Heavy drawer slides (especially full-extension undermount types) that need dead-flat side panels. Even 1/8” of rack causes binding.
Once a carcass racks, the two side panels are no longer parallel in plane, so the drawer slide rails end up mounted at a slight angle to each other. The drawer then rubs, won’t close flush, or leaves a wedge-shaped gap at the face. Ever notice a drawer that closes fine on the left but catches on the right every single time? That’s usually your first clue.
Step 1: Diagnose Where the Twist Is
Before you touch anything, confirm the carcass is actually racked and not just mis-shimmed during install.
- Pull the drawer boxes and slides out.
- Measure both diagonals from corner to corner on the front opening. A difference of more than 1/16” over a 24” opening means it’s racked.
- Check the back panel for gaps or bowing. A loose back is the most common racking culprit, by far.
- Run a long level or straightedge across both side panels to see if one has twisted out of plane.
Step 2: Release the Cabinet from the Wall
If the box got screwed to studs while it was already twisted, those wall fasteners are reinforcing the distortion right now. Remove or loosen the screws at the hanging rail and let the box relax. Often it will partially self-correct the moment it’s no longer pinned to an uneven wall.
Step 3: Square the Carcass
With the cabinet free-standing or loosely supported:
- Set the box on a flat, known-level surface (a workbench or a sheet of 3/4” plywood works fine).
- Measure diagonals again and clamp across the long diagonal, pulling the longer measurement shorter until both diagonals match.
- Check that the back panel seats fully into its dado or rabbet. If it was proud or unglued, pull it flush and re-fasten with glue and 1” brads every 6-8”.
- Reinforce the top with a hanging rail or stretcher if one’s missing. A 3” wide strip of 3/4” plywood, screwed across the back-top and flush to both sides, does more to stop future racking than almost anything else you can do.
- Let the glue cure fully, 30 to 60 minutes minimum, before you move the cabinet anywhere.
Step 4: Reinstall Square, Not to the Wall
Walls and floors are rarely flat, and that’s the trap most installers fall into. Shim behind the cabinet at multiple points instead of relying on screws to drag the box into alignment:
- Shim first, then screw. Never let the screw do the squaring for you.
- Run a torpedo level on both the face frame edge and the side panel, not just the front.
- Fasten only through shimmed points, so the hanging rail isn’t forced to bend.
Step 5: Reinstall and Test Drawers
Once the box checks out square (equal diagonals, level in both planes):
- Remount the slide rails parallel to each other, measuring from the front edge at multiple points. Don’t just eyeball it.
- Run each drawer through full travel before attaching the drawer face.
- Check reveal consistency around the drawer front, and adjust the slide screws in their slotted holes for final fine-tuning.
Preventing Future Racking
- Square and brace carcasses before installation, not after the fact.
- Add a center stretcher on cabinets wider than 30” to resist twist.
- Don’t lift assembled cabinets by one corner. This is a common cause of racking that happens during transport, before the box even gets near the wall.
- Use cam locks or dowels plus glue on back panels, not staples alone.
Conclusion
A racked frameless carcass is a structural problem, not a drawer adjustment problem. Shimming or re-aligning slides without squaring the box first only masks the symptoms for a while. Diagnose with diagonal measurements, free the cabinet from the wall, square and reinforce the back panel and hanging rail, then reinstall using shims instead of brute force. Follow that order and your drawers will glide true for the life of the cabinet.