Restoring a Warped Wooden Cutting Board With a Router Sled
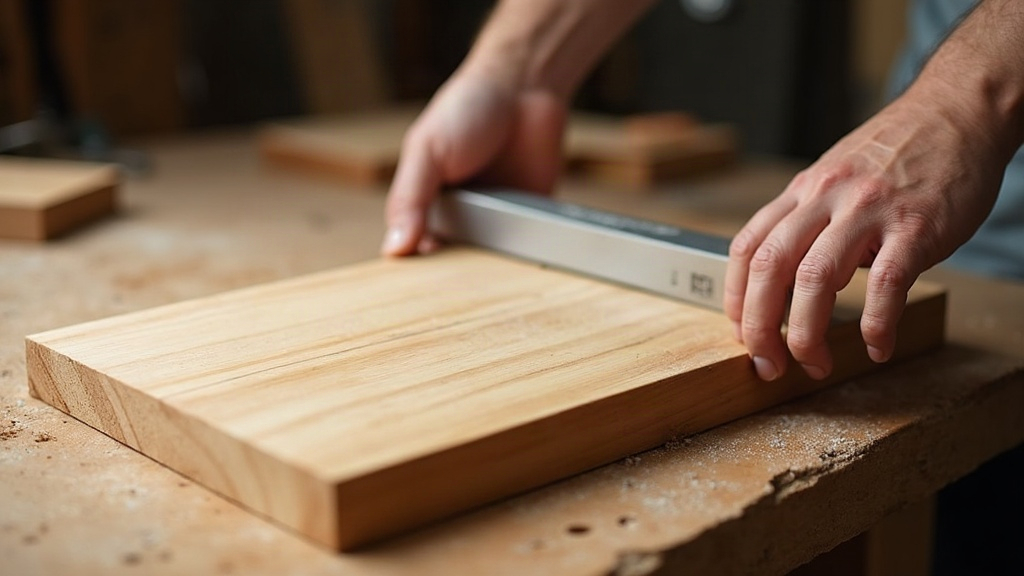
How to Fix a Warped Cutting Board with a Router Sled
A warped wooden cutting board doesn’t automatically mean the trash. Restoring a warped wooden cutting board with a router sled removes just enough material from the high spots so both faces sit flat again. It’s not a five-minute fix. You need a careful setup, light passes, and a good food-safe finish at the end. But do it right, and a board that rocks on your counter every time you chop an onion can go back to being a stable, everyday tool—just like other traditional wooden joinery techniques that take patience but deliver lasting results.
When a Router Sled Is the Right Repair Method
A router sled earns its keep on thick boards, end-grain butcher blocks, and anything too wide to fit through a planer. A hand plane just can’t compete here. The sled gives you a predictable reference surface and can tame a board that rocks so badly it practically has a tilt of its own on the bench.
Before you touch a router, look the board over carefully. Restoration is generally worth the effort when you’re dealing with:
- A moderate cup, bow, or twist
- No deep cracks running clear through the thickness
- No loose glue joints
- Enough remaining thickness to safely take material off
- No mold, rot, or lingering smell
A thin board is a different story. If flattening it would strip the thickness down below roughly 3/4 inch, you’re better off replacing it than repairing it.
Identify the Type of Warp
Set the board on a workbench you know is flat, and press down on each corner one at a time.
- Cup: The board curves across its width, so the center or the edges lift.
- Bow: The curve runs along the length instead.
- Twist: Opposite corners lift, and you get that diagonal rocking motion.
- Combination warp: Plenty of neglected boards have more than one problem going on at once.
Mark the high spots lightly in pencil. That mark is your progress tracker, and it keeps you from cutting away more wood than you actually need to.
Tools and Materials You Will Need
You can build a basic router sled out of straight plywood or MDF rails set parallel to each other. The router carriage rides across the rails, and a wide flattening bit does the cutting on the board underneath.
Here’s what to gather:
- A router with enough power to drive a wide surfacing bit
- A router sled with rigid, dead-level rails
- A flattening bit, ideally 1 to 1 1/2 inches wide
- Clamps or low-profile hot-glue blocks
- Shims, playing cards, or thin veneer scraps
- A straightedge or winding sticks
- Random-orbit sander
- Sandpaper in 80, 120, 180, and 220 grit
- Food-safe mineral oil and cutting board wax
- Safety glasses, hearing protection, and a dust mask
A bottom-cleaning or spoilboard surfacing bit cuts noticeably smoother than a standard straight bit, and it leaves you with fewer sanding marks to chase down afterward.
Set Up the Board Without Forcing It Flat
Here’s the part people rush, and it’s the one that matters most: supporting the board correctly. Don’t clamp it down so hard that you’re forcing the warp out by brute strength. Flatten a board while it’s bent under clamping pressure, and the moment you release those clamps, it can spring right back into its warped shape. All that work, gone.
Place the board on the sled base with its most stable face down. Slide shims under the low corners or the rocking spots until it stops moving when you press on it.
Then secure it, but gently:
- Add low-profile stops around the edges, or hot-glue small blocks just outside the cutting area.
- Check it can’t slide sideways while you’re routing.
- Confirm it’s supported, not bent flat by clamp pressure.
- Set the router bit to the highest point on the board.
If the board has a pronounced cup, flatten the convex (outward-curving) side first. Usually that removes less material overall and gives you a solid, flat reference face to work off of for the second side.
Flatten the First Face in Light Passes
Adjust the sled carriage so the bit can sweep the full width of the board. Start shallow, around 1/32 inch. Go deeper than that and you’ll invite tear-out, put strain on the router, and leave ridges that mean more sanding later.
Move the router steadily, side to side. Overlap each pass by about a third to half the width of the bit. Finish one row, nudge the carriage over slightly, and repeat.
Take your time and check the surface every few passes. Watch the pencil marks: they’ll vanish from the high spots first. Keep going until the cutter has touched wood across the entire face, no gaps left untouched.
Avoid Common Router Sled Mistakes
A handful of small mistakes can wreck what would otherwise be a clean repair:
- Taking heavy passes: Invites chatter and tear-out.
- Using flexible rails: Sagging rails give you a board that isn’t actually flat, no matter how careful your technique.
- Skipping the support shims: The board can spring back the moment you unclamp it.
- Routing against unstable grain: Tear-out shows up more around knots and where the grain direction flips.
- Leaving the router stationary: Even a couple of seconds idle in one spot, and you’ll burn a dark scar into the wood.
If you hit tear-out, back off the cutting depth and switch your direction of travel. Small damage like that usually disappears once you sand.
Flip, Support, and Flatten the Second Face
Once the first face is flat, pull the board off and brush away the dust. Set it back on the sled base with the newly flattened side facing down. It should sit firm without shims, though you might still need a bit of support if the sled base itself has some imperfections of its own.
Flatten the second face the same way, shallow passes, overlapping cuts. Stop the moment the whole surface reads level. You’re not chasing perfect symmetry here, you just want two faces that are flat and reasonably parallel, while keeping as much of the original thickness as you can.
Check the board again on a flat surface. No rocking should remain. Run a straightedge across the length, the width, and both diagonals to make sure no stubborn high spot slipped through.
Sand and Refinish the Restored Cutting Board
Even a careful router pass leaves shallow ridges behind. Work through the grits progressively instead of jumping straight to fine paper.
Start at 80 grit only if the ridges are actually noticeable. Then move up through 120, 180, and 220. Sand both faces, the edges, and any handle cutouts, keeping things even. Give the sharp corners a few hand-sanding strokes to soften them slightly; hard, crisp edges are more prone to chipping once the board’s back in daily kitchen use.
Clear off all the dust before finishing. Apply food-grade mineral oil generously, giving it time to soak into the end grain and the freshly cut surfaces. Wipe off the excess after 20 to 30 minutes. Repeat the process until the wood stops drinking the oil so quickly.
Finish it off with a cutting-board wax, the kind made from mineral oil and beeswax. It adds a bit of water resistance and leaves the surface feeling noticeably smoother under your hand.
Prevent the Board From Warping Again
Most cutting boards warp for one simple reason: one face gains or loses moisture faster than the other. A few habits keep a restored board stable for good:
- Oil both faces and all edges on a regular schedule.
- Wash it quickly by hand, never let it soak.
- Keep it out of the dishwasher, full stop.
- Dry it standing up so air reaches both sides.
- Don’t store it next to a hot stove or in direct sunlight.
- Flip it occasionally if one side gets used more than the other.
Restoring a warped wooden cutting board with a router sled isn’t a quick job, and it takes some patience. But for a board worth keeping, it’s a repair that pays off. Get the setup stable, keep your cuts light, and stay consistent with the oiling afterward, and that board can go right back into daily rotation for years.