How to Build a Clamp Rack From Scrap Plywood for Parallel Clamps
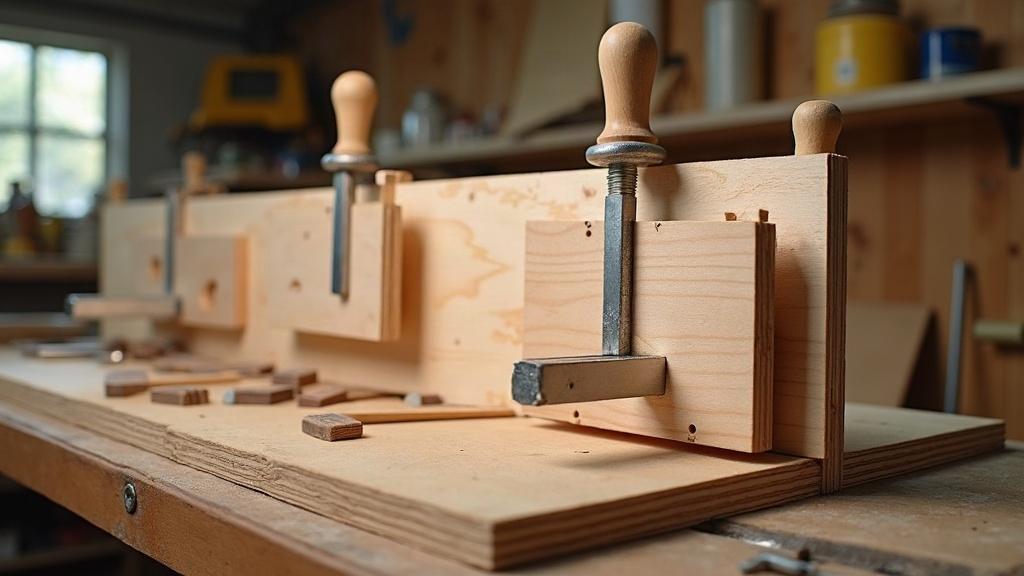
Clamp Rack Made From Scrap Plywood: Keep Parallel Clamps Organized and Off the Floor
A clamp rack built from scrap plywood is one of the cheapest ways to get parallel clamps up off the shop floor and within easy reach. The trick is simple: build a rigid frame with slots deep enough to catch each clamp by its fixed jaw, then bolt the whole thing into wall studs or a beefy French cleat. Grab a few plywood offcuts, a handful of screws, and you’ve got storage that holds serious weight without eating into your bench space.
Why Parallel Clamps Need Dedicated Storage
Parallel clamps are workhorses for panel glue-ups, cabinet assembly, and furniture builds. Great tools, terrible things to store. Long steel bars, wide jaws, real weight to them. Lean a handful against a corner and you’ve basically built a trip hazard.
Sure, leaning them against the wall is the default move for most of us. But it comes with problems:
- Pull one clamp and the rest slide down or tip.
- Bars tangle together, so finding the right length turns into a dig.
- Floor storage collects sawdust and steals walking room.
- A heavy clamp toppling over can dent a wall, chip a tool, or land on a foot.
A dedicated rack separates the fixed jaws and lets the bars hang straight down. Suddenly you can eyeball every clamp size at once and pull the one you need without disturbing the other seven.
Plan the Rack Before Cutting
Before you touch a saw, measure your actual clamps. Jaw width, bar thickness, handle clearance, these vary a fair bit between brands, so don’t guess.
For the common range of 24-inch to 50-inch parallel clamps, this layout tends to work well:
- Rack width: 24 to 36 inches
- Rack depth: 10 to 12 inches
- Vertical support spacing: 3 to 4 inches between clamps
- Plywood thickness: 3/4-inch plywood is ideal
- Slot depth: 4 to 5 inches
- Mounting height: leave enough room for the longest clamps to hang freely
A 30-inch-wide rack with eight slots spaced 3 1/2 inches apart comfortably fits eight parallel clamps. If you buy clamps in matched pairs (most of us do), plan the layout so each pair lands side by side. Saves you the hunt later.
Choose Sound Scrap Plywood
Scrap plywood is perfect here, but be picky about which scraps make the cut. Skip anything water-stained, badly warped, or starting to delaminate. This rack will be carrying real weight; a nice face veneer over a soft core won’t save you.
Good candidates:
- Cabinet-grade birch plywood
- Construction plywood, as long as it’s in decent shape
- Hardwood plywood offcuts
- A few smaller pieces glued together when nothing full-size is available
Skip MDF for the load-bearing parts. It’s fine for a light-duty organizer holding a couple of hand clamps, but under the weight of several parallel clamps and wall screws, it tends to split or sag over time.
Materials and Tools
Honestly, one decent-sized offcut and a box of screws will get you most of the way there.
Materials
- 3/4-inch scrap plywood
- 2 1/2-inch wood screws
- Wood glue
- 3-inch structural screws or lag screws for wall mounting
- Washers, if using lag screws
- Optional: wood finish, paint, or clear coat
Tools
- Circular saw, table saw, or jigsaw
- Drill and drill bits
- Countersink bit
- Speed square
- Tape measure
- Clamps (yes, you need clamps to build your clamp rack)
- Stud finder
- Sandpaper or a sanding block
Cut the Main Parts
The design itself is nothing fancy: two horizontal rails joined by side panels, with short plywood dividers between them creating individual pockets for each clamp.
For a rack roughly 30 inches wide, cut:
- Two horizontal rails: 30 inches by 5 inches
- Two side panels: 10 inches by 5 inches
- Eight to ten dividers: 5 inches by 4 inches
- One back mounting board: 30 inches by 6 inches
The rails become the top and bottom of the storage section. Dividers slot in between, creating open-ended pockets, and each clamp rests with its fixed jaw sitting in a pocket while the bar hangs straight down.
Working with narrow scraps? Glue two strips together before you cut the rails to length. Clamp them flat and give the glue plenty of time to cure before moving on. Rushing this step shows up later as a wobbly rail.
Lay Out the Clamp Slots
Mark divider positions on both rails before you attach a single piece. Even spacing matters more than you’d think; uneven slots make clamps a pain to pull out later, usually mid-glue-up when you’re least in the mood.
Start 2 inches in from each end, then space the remaining dividers at 3 to 4-inch intervals.
Before you commit to final assembly, dry-fit the spacing using one of your biggest clamps. Set the fixed jaw between two loose dividers and check three things:
- The jaw slides in without a fight.
- The handle clears the rack.
- Neighboring clamps won’t crowd or overlap too much.
If in doubt, go a touch wider rather than tighter. This is meant to speed you up during a glue-up, not turn into a puzzle you have to solve first.
Assemble the Plywood Clamp Rack
Run a bead of glue along the edge of each divider and set it on the marked lines of the lower rail. Check every divider with a square, 90 degrees, no exceptions.
Drive two countersunk screws through the bottom rail into each divider. Then glue the top edges of the dividers and drop the upper rail on, screwing it down the same way.
For extra stiffness, run the back mounting board across the rear edges of the rails and side panels. This board does double duty: it stops the whole rack from racking sideways under load, and it gives you a wide, solid surface to screw into the wall.
Reinforce High-Stress Areas
Loaded up, a parallel clamp rack gets heavy fast. Build in some margin where it counts:
- Glue and screws together, never screws alone.
- Predrill plywood edges so they don’t split.
- Add small triangular plywood braces under the lower rail.
- Mount into studs with structural screws.
- Never trust drywall anchors with a loaded rack. Not even “just for now.”
Ten medium-to-large parallel clamps can easily add up to over 100 pounds hanging on that wall. Build and mount with that number in mind, not with wishful thinking.
Mount the Rack Safely
Find at least two wall studs, three if you can manage it. Position the back mounting board so your screws land dead center in the studs, not just close.
Use 3-inch structural screws or lag screws with washers, two per stud minimum, one near the top of the mounting board and one near the bottom.
No studs where you need them? Mount a wide plywood ledger board across several studs first, then screw the clamp rack onto that ledger. It spreads the load across more framing and gives you flexibility on where the rack actually sits.
Leave at least 2 inches of clearance between the floor and the bottom of your longest hanging clamp. That gap stops bars from dragging and makes sweeping up sawdust a lot less annoying.
Useful Variations
Once the basic structure clicks, it’s easy to tweak for your own shop.
Add a Lower Shelf
A narrow shelf under the clamp pockets is a handy spot for cauls, glue bottles, clamp pads, or small F-style clamps. Keep it shallow so it doesn’t interfere with the hanging bars above.
Build a Mobile Rack
If your shop layout shifts around a lot, mount the rack on a heavy rolling cart instead of the wall. Locking casters and a wide base keep it from tipping over when loaded. Handy too if you’re assembling projects out in the middle of the floor rather than against a wall.
Use a French Cleat
A French cleat makes the whole rack removable, which is great if you rearrange your shop storage more than once a year (who doesn’t?). Just make sure the cleat is thick, well-supported, and both halves are fastened securely. This isn’t a spot to cut corners.
Conclusion
Building a clamp rack from scrap plywood is one of those afternoon projects that pays for itself the first week. Use sturdy material, size the slots to match your actual clamps, and anchor the whole thing into solid framing. What you get in return: safer storage, faster access mid-glue-up, and a shop floor you can actually walk across without dodging steel bars.